After much anticipation, the CMF Phone 1 (review) is finally here, and if you’ve ordered your unit alongside an additional back panel, this guide is for you! Out of the box, you get to choose from the Black, Orange, Blue (India-Exclusive), and Orange colorways, with no additional panel in the box.
So, you will need to get the other panel bundles for Rs 1,499 each. Once you do, you can open and change the back cover of the CMF Phone 1 to customize it. Oh, and the battery ain’t removable, if you’re wondering.
As a new user, it will seem like quite a daunting task to change the back panel of the Phone 1. The good thing is, once you get the hang of it, it’s pretty straightforward. So, I have outlined the step-by-step process to make changing the CMF Phone 1’s back cover an easy process!
How to Open CMF Phone 1 Back Cover
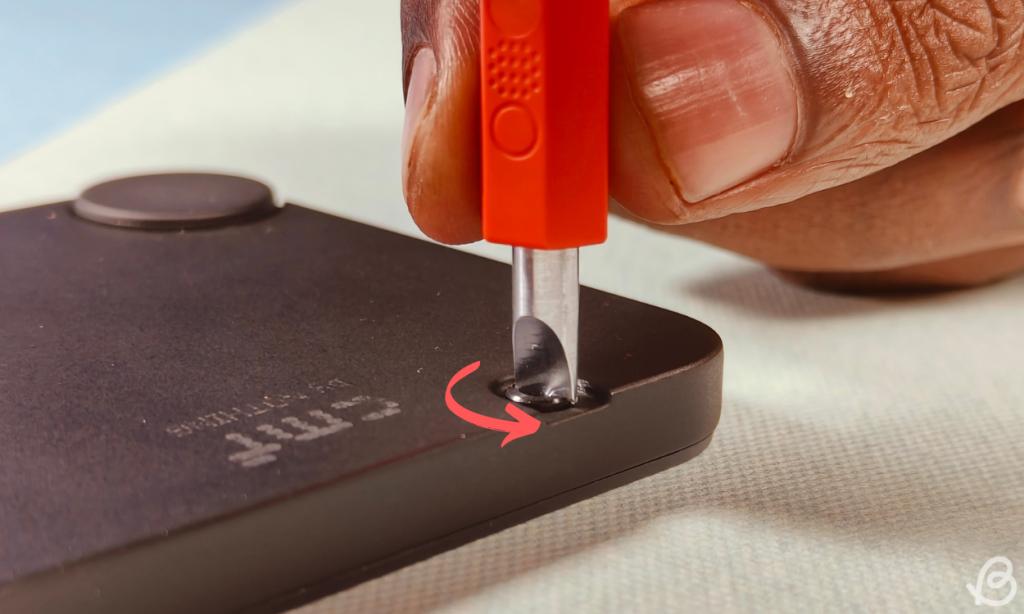
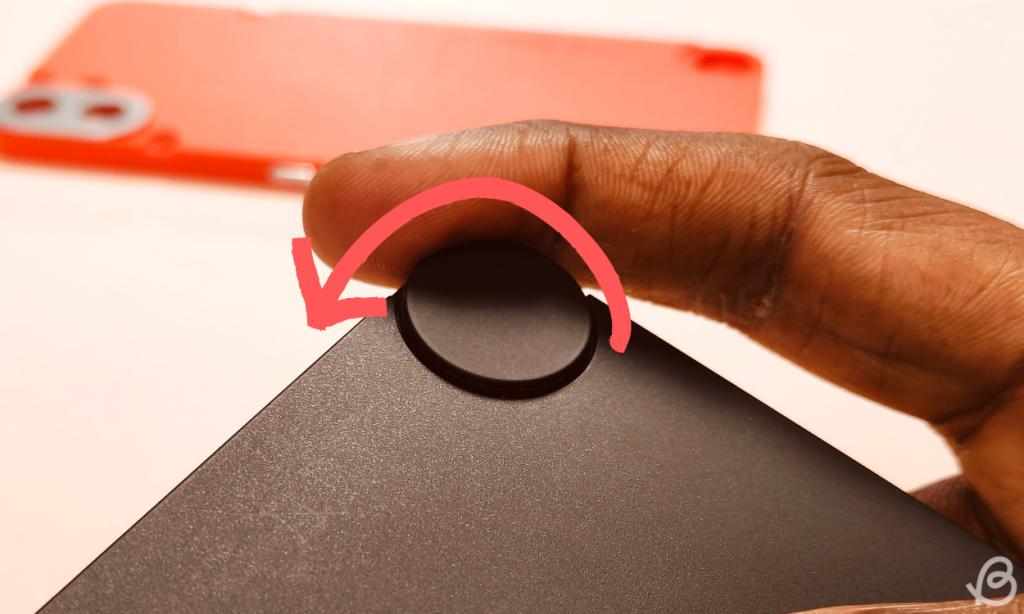
The CMF Phone 1 has four screws that you can unscrew and a dial at the back, which can be taken off easily by rotating it anti-clockwise.

With that being said, follow these steps to open the CMF Phone 1’s back cover the right way:
- Firstly, using the provided screwdriver-SIM ejector or a standard screwdriver, rotate the screws anti-clockwise to unscrew them. Don’t forget to store the screws carefully after unscrewing as we almost lost one at the office!
- Next, focus your attention on the dial at the bottom right. Use your index finger and rotate the dial anti-clockwise to unscrew it.
- Then, using the SIM ejector side of the tool, take out the SIM tray.
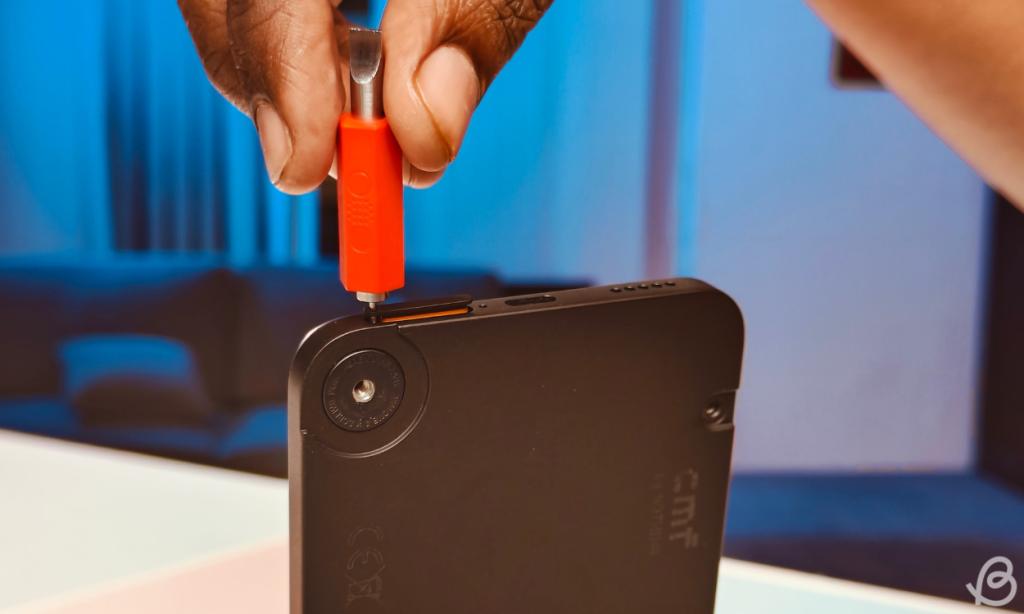
Pro Tip: Before taking off the panel, ensure that you have taken off the dial and the SIM card tray. If you forget to do that and try to yank off the back with the SIM tray attached, you’ll certainly break something.
- Next, you will have to take off the back cover. To do this the right way, turn the phone upside down and while you’re holding it in one hand, gently press the circular indent where the dial was and use the SIM card tray for grip to yank off the panel. If you take a close look, you will see that the circular dial area reads “PUSH HERE TO RELEASE”.
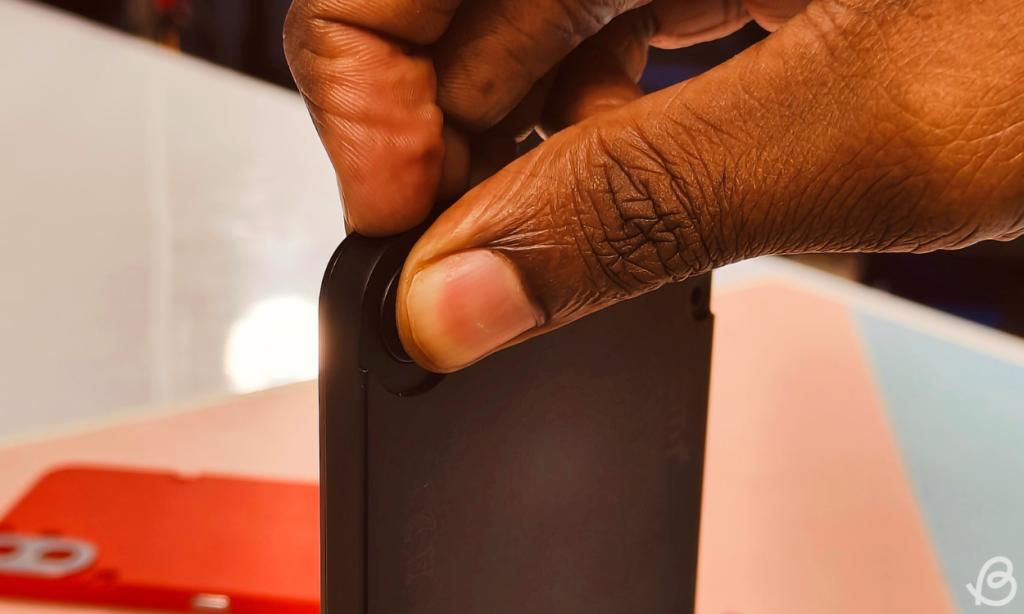
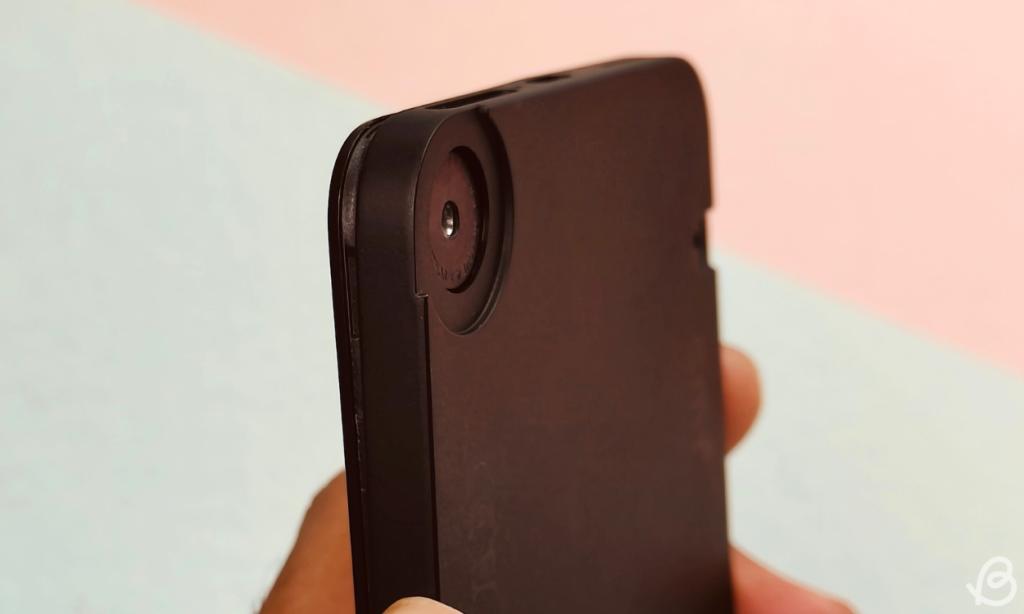
- And just like that, you will have successfully removed the CMF Phone 1’s back cover!
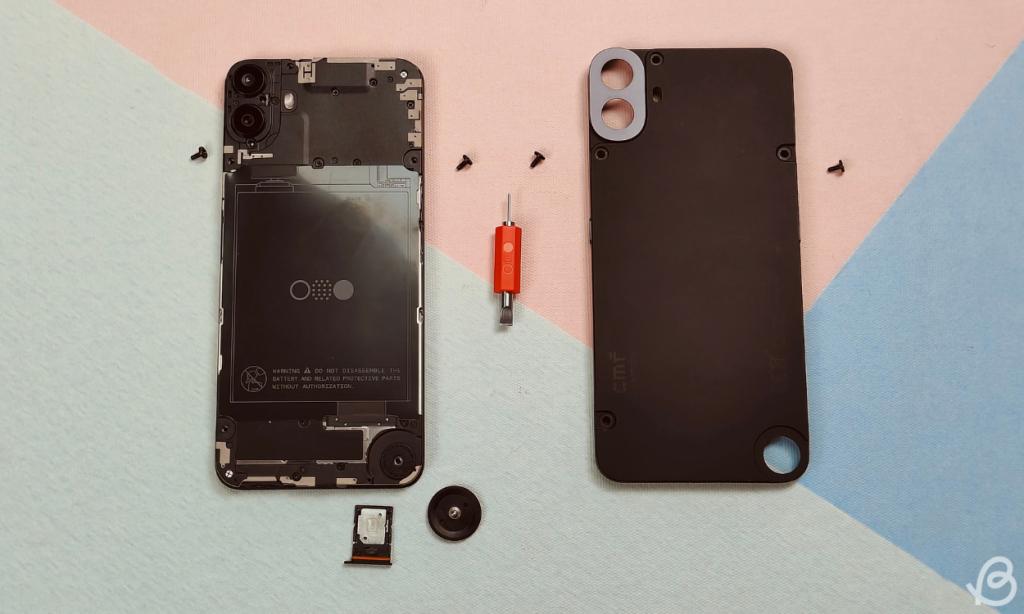
How to Change CMF Phone 1 Back Cover
Once the default panel is out, you can place the new back panel (one of the many new accessories for CMF Phone 1) on the bare back of the phone, adjust it so that it sits right, and then proceed to screw in the screws and the dial.
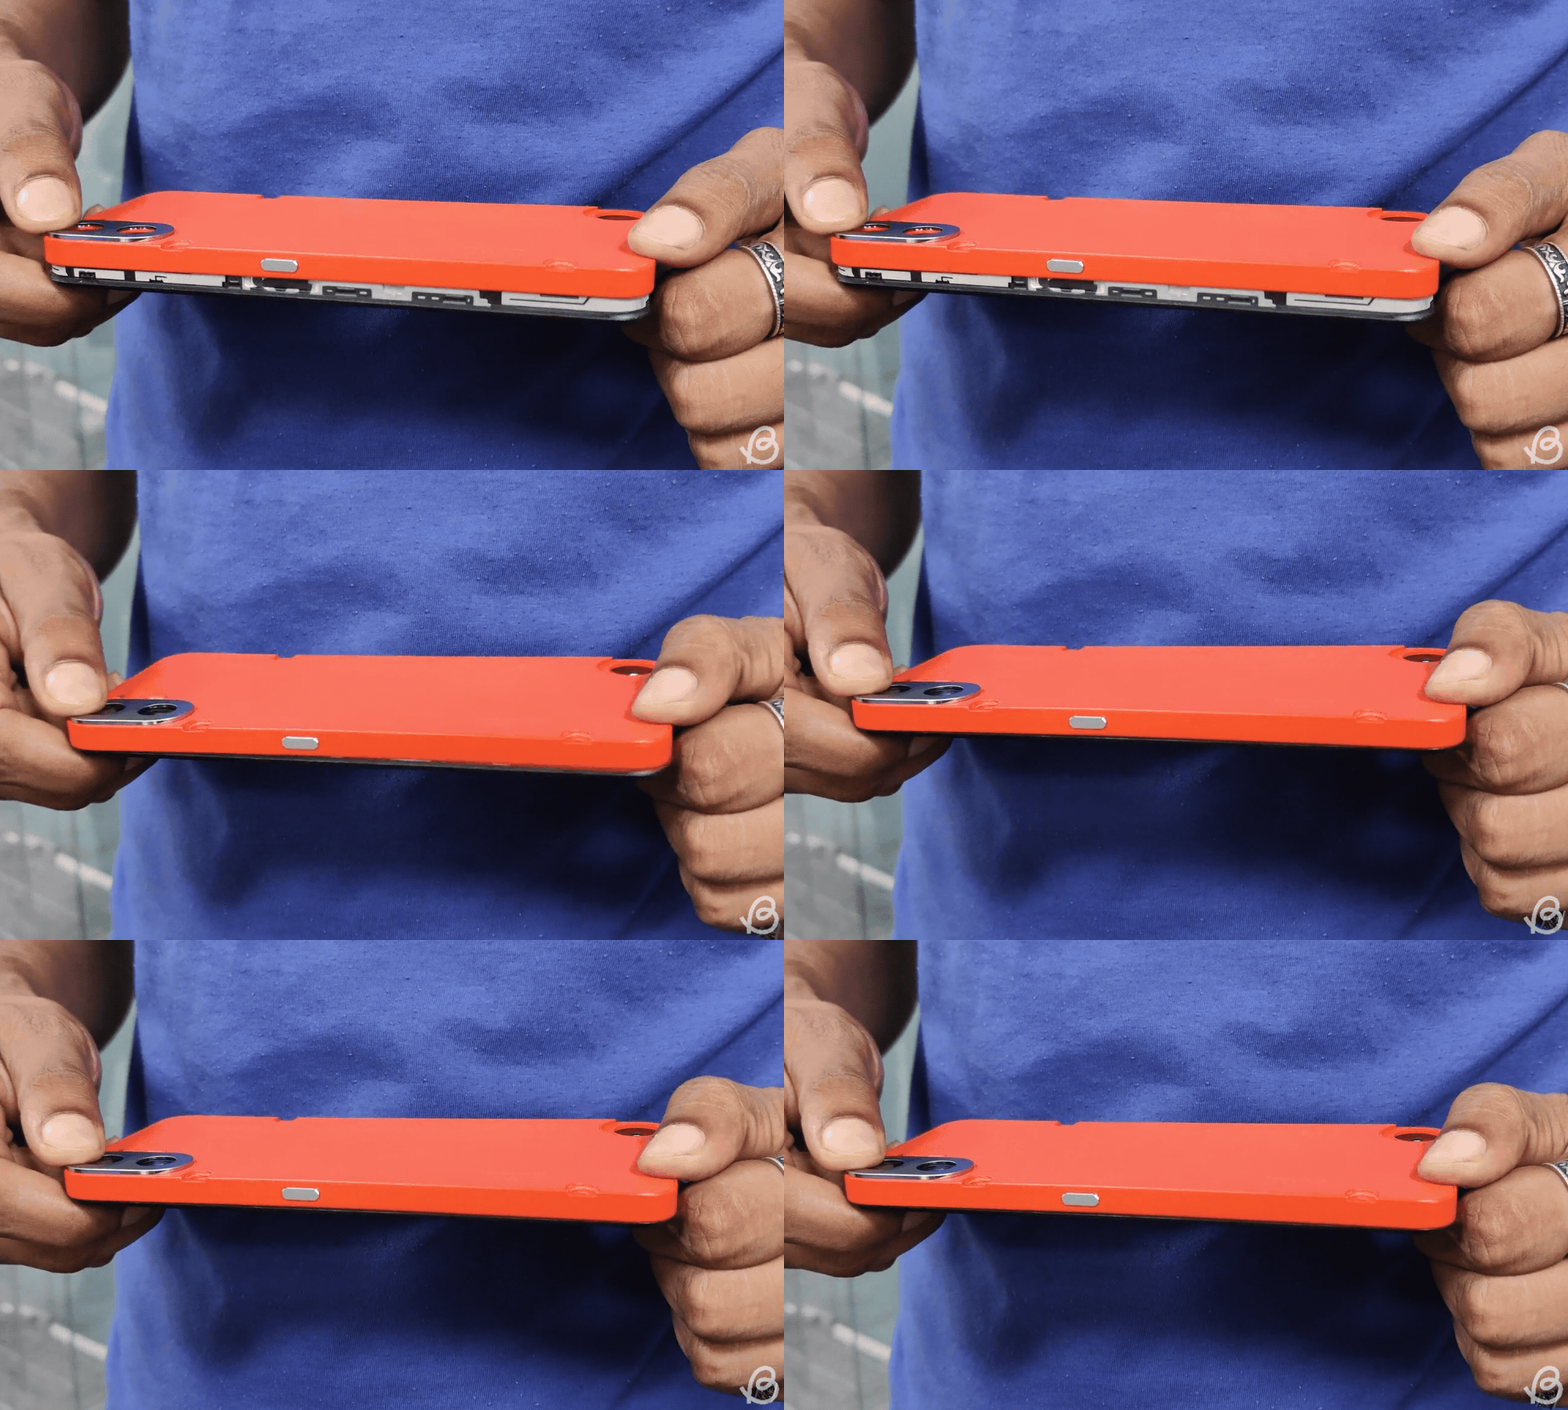
Start by putting the screws in and tightening them by turning the screwdriver clockwise this time. Then, simply insert the SIM tray and screw the dial back in no particular order.
Some Tips to Change CMF Phone 1’s Back Cover
- When replacing the new back panel, don’t screw it in too tightly. That will cause you to apply more pressure than required, possibly causing the screwdriver to slip away and damage the surrounding areas unnecessarily.
- Don’t forget to remove the SIM tray before removing the case.
- Keep the screws safe when changing the panels else you will have to spend Rs 1,499 again for another bundle if you lose them.
- After unscrewing the screws and removing the dial, make sure you press on the dial’s vacant spot and then remove the back.
Is Changing CMF Phone 1’s Back Cover Worth it?
Talking about the process to change CMF Phone’s back cover, it’s not rocket science and it hardly took me 5-7 minutes to replace the back panel. The screw driver-SIM ejector hybrid tool that CMF has provided is a bit unhandy. You can use any other screwdriver as well for the process.
Screws are non-magnetized and keeping them in position while screwing the back case is a bit challenging task. Also, it’s another challenge to store the screws securely due to their tiny size. We almost lost one screw at the office.
Keeping aside the process, the back panel, screw, and sim tray bundle cost Rs 1,499, which is a bit expensive for a phone that costs Rs 16,000. Nonetheless, customization is one thing that you gain from it.
There’s huge potential for customization in the phone as you can mix and match different colored back cases, SIM trays, screws, and dials for the design you like.
However, it’s only when you get your hands on multiple of those back panel bundles that you can mix and match a bit to make your CMF Phone 1 as colorful as possible. By the end of it, you can make your phone look like this:
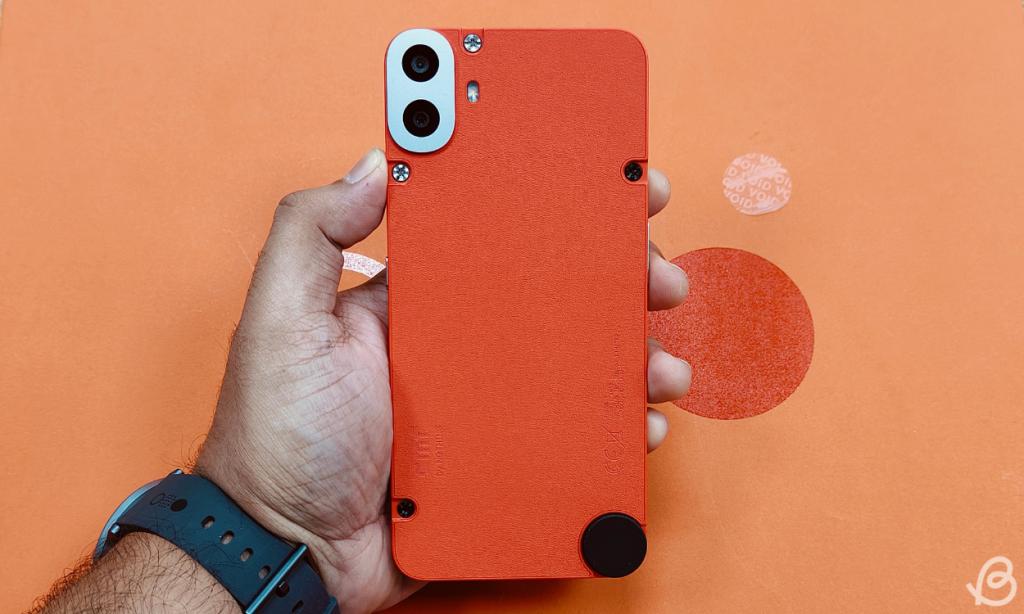
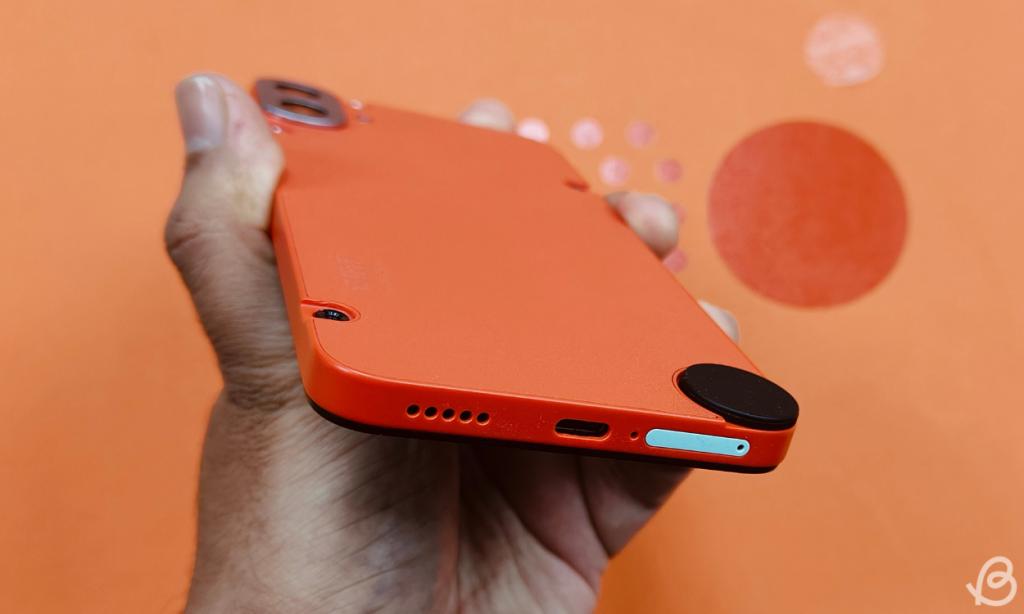
As you can see here, I replaced the Black panel with the Orange one and used two of its silver screws. Meanwhile, I kept the Black dial and stole the Green variant’s SIM tray. It’s a Zombie Phone 1, but I like it!
But since back panel customization is one of the CMF Phone 1’s selling points, the brand should have included at least one extra colored panel and the required tools in the box.
Besides, while the process itself is not exactly hard, it makes me question the number of times I’d like to go through it to customize my phone. I’m more of a one-and-done guy when it comes to these things. So, I’ll probably just leave it alone after one or two times at max. In that case, buying an extra panel for that money doesn’t seem worth it to me. Just get a good-looking back cover, instead.
In addition to back panels, the CMF also offers accessories like a lanyard cable, a phone stand, and a wallet case for the phone at an additional price. What are your thoughts on the swappable back? Let us know in the comments below.
Mortal Kombat 1: Sindel Moves And Combos Guide
How To Control Apple TV With IPhone
NYT Connections Today: Hints And Answers For August 29, 2024


